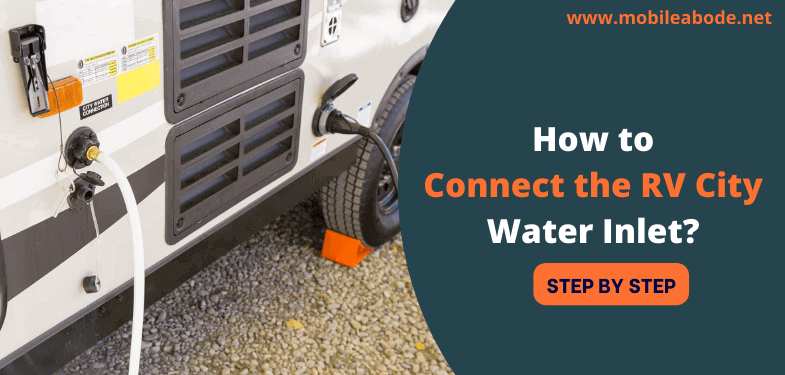
RVs provide a great way to travel and see the country and offer all home amenities. One of those amenities is city water, which allows you to connect to municipal water sources and enjoy clean, fresh water without having to haul it yourself. However, connecting your RV’s city water inlet can be confusing if you’re not sure what to do.
Here’s a guide on how to properly connect your RV’s city water inlet. We’ll also discuss how to flush out your RV’s fresh water system after connecting to the city water. So read on for more information.
RV Water Inlet Connection
What is the RV City Water Inlet and what does it do? The RV City Water Inlet is a water inlet that is designed for RVs. It is a quick and easy way to connect your RV to a water supply and it is also very easy to use.
It is also available in a variety of colors, so you can choose the one that best matches your RV. The inlet is made from durable materials and it is easy to install.
The RV City Water Inlet allows you to connect to a water source and have fresh water available in your RV. This can be a great convenience when traveling or camping, as it eliminates the need to haul water with you.
The inlet can be connected to a hose or faucet and the water will flow into your RV’s fresh water tank. The inlet also has a built-in filter to keep out dirt and debris. You can then use the water for drinking, cooking and other needs.
How to identify the City Water Inlet on your RV?
- The City Water Inlet is the connection point on your RV where you hook up to a water source outside the RV, such as a spigot or hose.
- It is typically located near the front of the RV, on the side or rear.
- It may be visible or it may be hidden behind a panel or access door.
- It is typically a white or silver colored panel with a small hole in the center.
- If you cannot find the City Water Inlet, consult your RV’s owner’s manual or ask a staff member at a campground or RV park.
How to connect your RV’s water hose to the City Water Inlet?
- Park your RV at a site that has water hookups.
- Locate the city water inlet on your RV. This is usually located near the front of the RV on the driver’s side.
- Connect one end of your water hose to the city water inlet. Make sure that the connection is tight and secure.
- Turn on the water at the city water hookup. You may need to use a wrench to tighten the connection.
- Open all of the faucets in your RV, including any outside showers or hoses, to allow air to escape and prevent backflow into your RV’s freshwater system.
- Allow the water to run for a few minutes to flush out any contaminants that may be in the line.
- Close all of the faucets and enjoy your RV’s fresh, clean water!
What are some common problems with connecting the RV City Water Inlet and how can you prevent them from happening?
Here are some common problems with RV City Water Intel and their prevention.
1- Leaking
One common problem that can occur when connecting the RV City Water Inlet is a leak. This can be prevented by making sure that all of the connections are secure and that there are no cracks or holes in the hoses or fittings.
If everything is secure, then try turning on the water slowly to see if the leak persists. If it does, there may be a problem with the washer inside the inlet itself. To fix this, you will need to replace the washer.
2- Dirty Water
If you notice that the water coming out of your RV city water inlet is dirty or has sediment in it, flush the line by running water through it for a few minutes before using it.
This will help to clean out any debris that may have gotten into the line. If the problem persists, you may need to have your RV’s water system professionally cleaned.
3- Low Water Pressure
If you are noticing low water pressure coming from your city water connection, there are a few things that you can do to try and fix the problem.
Try flushing the line by running water through it for a few minutes. If the pressure is still low, you may need to have your RV’s water system professionally serviced.
How to flush out your RV’s fresh water system after connecting to city water?
If your RV has a freshwater system, you’ll need to flush it out after connecting to city water. Here’s how:
- Fill a clean bucket with fresh water.
- Attach the hose from the fresh water tank to the fill spout on the bucket.
- Open all the faucets in your RV until the water runs clear.
- Close the faucets and disconnect the hose from the bucket.
- Flush the toilet several times to refill the bowl with fresh water.
- Pour a cup of bleach into the holding tank and add enough water to rinse it down.
- Flush again and leave the bleach solution in for at least six hours before emptying the tank.
- Refill the fresh water tank and you’re good to go!
FAQs – City Water Connection For Camper
Do you need the water pump on when connected to city water?
No, the water pump is not needed when connected to city water. However, it is recommended to have the water pump turned on when using city water to ensure that there is enough water pressure for the RV. Additionally, having the water pump on will help to protect your RV from any potential damage that could occur if there is a sudden drop in water pressure.
Why Is My RV city water connection leaking?
If you have an RV city water connection that is leaking, there are a few possible reasons why.
- First, check to see if the leak is coming from the connection itself or the hose. If it is coming from the connection, then it is most likely due to a bad O-ring or washer.
- If the leak is coming from the hose, then it is most likely due to a hole or crack in the hose.
- If you have checked both the connection and the hose and you still can’t find the source of the leak, then it is probably coming from the water pump. If this is the case, then you will need to replace the water pump.
What’s the difference between a freshwater connection and a city water connection?
There are a few key differences between city water and freshwater connections.
City water is derived from a municipality’s water treatment plant, while freshwater connections come from private wells or other natural sources. Because city water must meet certain safety standards before it can be used, it is typically of higher quality than freshwater.
In addition, city water is usually more expensive than fresh water. Finally, city water connections typically require a permit, while freshwater connections do not.
Why Is My RV water pump pumping water out of the city’s Connection?
If your RV water pump is pumping water out of your city’s connection, there are a few things that could be causing the problem.
- The most likely culprit is a bad check valve in the city water connection. If this is the case, simply replacing the check valve should solve the problem.
- Another possibility is that the washer on the city water connection is not sealing properly. This can be fixed by simply replacing the washer.
- If neither of these solutions solves the problem, it is possible that there is a problem with the RV water pump itself. In this case, you will need to take the RV to a qualified repair person to have the pump checked and repaired or replaced.
Final Words
The process of connecting the RV city water inlet is not complicated, but there are a few things you need to do to make sure it is done properly.
- First, turn off the main valve to your RV.
- Next, remove the cap from the city water inlet and screw on the adapter.
- Finally, turn on the main valve and open up all of the faucets in your RV to bleed out any air that may be in the lines.
By following these simple steps, you can easily connect your RV to city water and enjoy all of the benefits that come with it!

